Updated on May 2nd, 2024
Here is everything you need to know before climbing Mount Kilimanjaro, including your full packing list. Standing on the “Roof of Africa” as I witnessed the sunrise is a moment I will never forget. If you have ever dreamed of doing the same then look no further.”
Where?
Mount Kilimanjaro, Tanzania
Why?
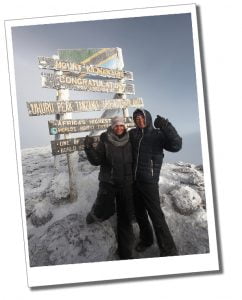
Last year I fulfilled an ambition when I made it to the summit of Mount Kilimanjaro. It took me 8 epic days to get there. Standing on the “Roof of Africa” as I witnessed the sunrise is a moment I will never forget. It was worth every step, every doubt & every struggle along the way.
Before I went it seemed that everybody I met, knew someone who had climbed the mountain. It made me believe that in general it is regarded as easy. I can categorically say now that it is not! You can read all about my journey from suffering altitude sickness to conquering the daunting Barranco Wall before reaching the summit. dedicated to my challenges & triumphs along the way. I believe I made it partly due to the preparation I put in & wanted to share my thoughts, lessons & recommendations here.
I hope you find this useful & it helps you in some small way to conquer the giant that is Mount Kilimanjaro!
Everything You Need To Know Before Climbing Mount Kilimanjaro, Including Full Packing List
Why go?
Mount Kilimanjaro is the highest peak in Africa. It stands at 5895m above sea level. It is also the tallest free-standing mountain in the world. Where Kilimanjaro is unique among the other highest continental peaks (Seven Summits), is that it’s possible to climb without any specialist equipment or expertise. This could give the impression that it is easy. Take it from me, it is tough!
Success rates are currently quoted as around 65% across all routes but the way you choose to ascend is important in maximising your chance of summiting.”
If all this appeals to your sense of adventure & you are up for the challenge, then I wish you good luck & keep reading.
When to go?
Mount Kilimanjaro does not have major winter & summer extremes but there are wetter times of year to climb. The less rain, the more chance of success. Therefore, it is advised that you attempt the trek during the dry seasons which last between Dec & the beginning of March, & then from late June to the end of October. I went at the start of October & every morning we had amazing views of the summit with blue skies & sunshine. By lunchtime, the clouds rolled in & it often rained during our afternoon treks. Be prepared for all weather conditions no matter when you decide to take up the challenge & expect it to be cold. It may be Africa but at these altitudes that is irrelevant.
In addition, you may want to summit on a full moon, which I did. The benefits of this are realised at night when the clouds clear & you see the summit lit by the moonlight, the glaciers glistening.”
Also, on summit night you start the climb around midnight using head torches. The bonus of being lit by the full moon made it extra special. For dates of the full moon & best times to make the climb, Ultimate Kilimanjaro has all the details as well as loads more information to help you further.
How much does it cost?
This is a huge question with a lot of variations depending on your budget. It is not a cheap destination but ethically there are also a number of considerations. The price you pay will always include the standard fees to the National Park which in total will be around US$200 per climber per day. It is, therefore, cheaper, the less time you spend on the mountain. Climbs can last anything between 5 – 10 days.
However, the shorter your climb, the less time you have to acclimatise & this may impact your chances of making it to the summit. Success rates on the shorter routes can be as low as 50%.”
For me, why do it if you are not going to give yourself the best chance possible of making it? For this reason, I chose to take 8 days via the Lemosho Route which increased my chances to between 80-90%.
Porters
The most important consideration is that the cheaper the operator you decide to use, the costs are most likely shaved off in the pay & equipment supplied to the porters. In my opinion, the porters are the heroes of the mountain. When you see the weights they carry (on their heads) & the speed they travel to make our dream possible, this is NOT where you want to save money. To climb ethically you need to choose an organisation which is recognised as treating & paying their porters appropriately. You can see an up to date list of approved operators by following THIS LINK.
Tipping
Bear in mind that sometimes going with a lower cost company may mean that your initial outlay is smaller but there is an expectation of tipping at the end of the trip. The advice we had, increased the individual costs by US$500 once we tipped. Your company will give you an advised level of expected tips before you leave, depending on the jobs the individuals do & the number of days you are on the mountain. This ranges from US$25/day for the Guide to US$9/day for a general porter. There were 12 people on the mountain to make it possible for 2 of us to get to the top.
Equipment
Another big consideration is the quality of the equipment provided, especially tents & all-important sleeping bags. It is cold on the mountain & being comfortable at night is essential.
Also, consider the training & safety procedures which you may need if you get into trouble. Budget operators again may skimp on this.
There are many international operators who take people up the mountain but we decided to book through a local agent. Monkey Adventures had excellent reviews, & answered all our questions on the quality of the equipment. We believed that the money would be staying in Tanzania, a priority for us.
How long does it take?
The biggest challenge of tackling Mount Kilimanjaro is the altitude. It is an unknown quantity for all of us. The time & distance that you hike each day is less relevant. Most important in how you cope is the heights you climb to & camp each day. In general terms, the longer you spend getting to your goal, the more opportunity you have to acclimatise. A 5-day hike, therefore, has a lower chance of success than a 10-day one. I chose to take 8 days to maximise my summit possibilities.
Which route do you choose?
This is the big question & all-important in managing your expectations. Very basically there are 7 potential routes:
Marangu.
This is also known as the “Coca-cola” route as it is generally considered the easiest on the mountain. In addition, it tends to be the least scenic & with poor acclimatisation. This is the only route where accommodation is provided in huts (on all others you sleep in tents). The route can be tackled in 5 days but with low success rates. It is recommended that you take 6 days to increase your summit chances.
Distance: 72 km, average duration: 5-6 days, success rate: 50%
Machame.
Nicknamed the “Whiskey” route. More scenic & a popular choice but steeper than Marangu & enjoys better success rates. It usually takes 6 days but again the recommendation is to take 7 to increase success.
Distance: 62 km, average duration: 6-7 days, success rate: 75%-85%
Lemosho.
This was my choice. One of the most scenic & quietest routes, with one of the highest success rates on the mountain. It can be tackled in a minimum of 6 days but recommended are the 8 or 9-day options. I took 8 days.
Distance: 70 km, average duration: 7-8 days, success rate: 80%-90%
Northern Circuit.
This is the newest & most remote route. It takes 9 days to complete & is the longest in distance but apparently, the views are spectacular with very good acclimatisation rates. Distance: 98 km, average duration: 8-9 days, success rate: 95%
Rongai.
Rongai is the only route that approaches the mountain from the north & takes 6-7 days to complete. I have read that the scenery can lack a bit of variety, but it is quieter, & easier. Distance: 73 km, average duration: 6-7 days, success rate: 65%-80%
Shira.
This is basically the same as Lemosho but starts a lot higher, leaving climbers more prone to the effects of altitude sickness. Takes 7-10 days.
Distance: 56 km, average duration: 7-8 days, success rate: 85%
Umbwe.
The most challenging route & for experienced climbers only, confident in fast acclimatisation. It includes difficult slopes which have a rapid ascent profile. Takes a minimum of 5 days but as a result of all this has very low success rates.
Distance: 53 km, average duration: 5-6 days, success rate: 60%-70%
How do you deal with the altitude?
The key to summitting Mount Kilimanjaro is all dependent on how your body responds to the altitude. That said, there are a number of things that you can do to decrease the impact. Having already experienced high altitudes in Bolivia, Peru & Ecuador, I was confident in my body’s ability to handle it.
However, the thing with altitude is that you never know. On any given day, under different circumstances, it can affect you considerably.”
Drink Water
The best advice is to drink plenty of water. I had a 2-litre camelback pouch which I aimed to finish during the hike each day, followed by another litre bottle to which I added rehydration salts. In addition, there was hot water at each meal for tea, coffee, hot chocolate & later in the climb, ginger tea. In all, I probably consumed about 3.5-4 litres per day.
Eat Well
The other thing to keep an eye on is your appetite. When I was hit by the altitude, I couldn’t face food. Eating just increased the nausea I felt. You will be provided with plenty of delicious food & when you feel like eating, make the most of it. You need the energy & never know when you may lose your enthusiasm for the food on offer. There should be plenty of opportunities before you start the climb to discuss dietary requirements. The chef will then make every effort to ensure you are catered for.
Be Honest
The guides should check your vital signs every morning & evening for oxygen saturation & pulse rates. They make a note of it each evening as well as asking a number of questions:
- How would you rate how you feel (0-10)? Why?
- Have you had a headache? Nausea? Vomiting? Diarrhoea?
- Did you take any medication?
- How was your appetite?
The important thing throughout the climb is to be totally honest. The questions are there to enable the guides to safeguard your health & wellbeing.
Walk Slowly
The speed you walk is also a factor. On the mountain, you often hear the mantra “Pole, pole”. This is Swahili for “Slowly, slowly”. If you try & rush, the altitude will most likely affect you more.
The slower you walk, the better you acclimatise. This is often why super fit people fail to get to the top, they push too hard & their body rejects the altitude.”
Medication
There is a medication (acetazolamide) which I was recommended to take by a friend who had climbed the mountain. I didn’t use it in the end as it was not freely available on the NHS in the UK (rightly so, I think). I would have needed to organise a private prescription which I had run out of time for. As someone who rarely takes medication for anything, at this point I was reluctant to add elements my body was unfamiliar with into the mix. It turned out I did not need it anyway.
You can read my experiences with altitude sickness in my blog posts but I had one incident when I was totally nauseous & exhausted. Another day felt like a total out of body experience. I found breathing really heavily helped me. It gave me something to focus my attention on & I also used cough sweets to keep my mouth moist as it dried out quickly. The NHS has some great information about altitude sickness, click the link for more details.
How fit do you need to be & what training is required?
Again, the stuff I read before going to Tanzania could have lulled me into a false sense of security. The truth is that you don’t need to be a super athlete but the fitter you are, the better chance you have.
For general fitness, if you can get to a point of running a regular 5 – 10km then this will help you. Hiking as much as you can is obviously advised. While hiking try & carry your daypack with 10kgs to prepare further.”
Unfortunately, I don’t live close to any real hills & although I had plans to go away for weekend hikes, it never materialised. I organise a charity walk which happens every year at the end of September & I did the longest route at 15 miles & tried pushing the pace to complete it as quickly as possible.
All About The Legs!
The most important aspect of my training preparation was to employ a personal trainer. I started with her in June & saw her twice a week up until I left for Tanzania in early October. She was tasked with getting me ready & was totally successful. For months she had me squatting, lunging, rowing & cycling.
Most important was the box stepping. When she said we were doing 500 steps onto a 20-inch platform, I looked at her like she was mad! But I completed it. Next time came the same, with a 10kg weight vest on. Then it was 750, followed by 750 in the weight vest. My final challenge was 1000… in the vest. It seemed like a daunting task, was the most boring workout I have ever done, took 1 ½ hours but was the best thing at getting me ready.
This alone not only tested my leg strength & endurance but also my mental ability to just keep going. She was genius & I can honestly say that this was one of the main reasons that I made it. Thanks, Claudia!”
Despite all the training, for me, the hardest part was the descent which you don’t really prepare for. This will be where you need every ounce of your mental resilience.
Who do you go with?
You can choose to do a private trip or go with a group. Private is obviously the more expensive option. My advice is to choose carefully who you decide to join to take on this epic adventure. I ended up going with a friend who I had only met once before, at a yoga retreat in Cuba. Our second meeting was in Moshi, Tanzania but she turned out to be the perfect climbing partner. I was very lucky!
When we booked, nobody else was registered so we had our pick of the dates. We chose the full moon, which they then opened up to everyone else. There was an expectation that we would have gained quite a group by the time the big day arrived. We didn’t & ended up going just the 2 of us. It was perfect. Brigit was the equivalent amount of low maintenance to me, positive, enthusiastic & with an equal love of all food!
The advantage of being a small group became obvious early on. We were much more mobile, keeping a similar pace, stopping less & getting moving again quickly.”
In addition, we were able to start earlier in the mornings as we were easier to get sorted & together. The good thing was that we got on so well & ended up being well-matched on a number of levels.
How important is your mindset?
For me, this was key. I wanted to believe I could summit but also made peace with myself that if I didn’t, it was fine. Making the effort & experiencing the journey was most important. I was also worried about the impact my actions would have on Brigit & her dreams too.
We made a pact before we started. The plan was to be on the mountain for 8 days, therefore we would not try & cut it short. In addition, it was important to me that we agreed on our strategy for summit night. If I couldn’t make it (to me this was the most likely scenario), then Brigit would leave me (obviously with a guide) & carry on. I didn’t want her to stop too as I may have pushed myself too hard, not wanting to ruin her chances. Overall, we were incredibly supportive of each other, but I felt it was important to set ground rules upfront.
Do you need to buy a lot of equipment?
The answer to this is a resounding “NO!”. We actually hired most of the kit & I’m very glad we did. Even discussing our needs in the hire shop, gave us greater insight. We went to AT Gear on our first day in Moshi. They literally have everything you could possibly require, some more suitable than others. My advice is to make sure you have time to organise this in Moshi as you will need to try everything on for appropriateness & best fit. They have plenty of choices.
What I hired in the end:
- Duffel bag to hold all my stuff.
- A sleeping bag which was gold dust! Warm even on the coldest nights.
- Thermarest which I chose to pay extra for, rather than having just the standard foam mattress. I never regretted it.
- Pillow.
- Walking poles. I used them for the descent but mostly they stayed in my pack. I seemed to be the only person on the mountain not using them throughout.
- Ski jacket & ski pants, just for summit night.
- Fleece trousers, as above.
- 2 pairs of gloves. One inner fleece pair & outer ski mittens (recommended if you plan to use hand warmers).
- Waterproof trousers.
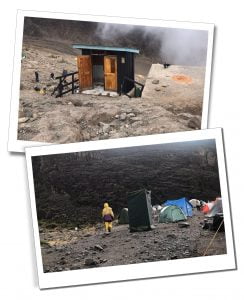
Private toilet. Yes, you read that right!
We chose to hire a toilet which thankfully also came with its own tent (apparently in the past you had to hire this in addition?!).”
There are long drop facilities in all camps & occasionally en route, but these can be smelly & unpleasant. If you hire your own, be aware that you will also require an extra porter to carry & clean it. They deserve a good tip!
What should I buy?
For me, it was important to own things like my thermal top & leggings base layer, in merino wool. It was the best purchase I made as they were my pyjamas every night, a godsend for summit night & also the base for a number of days trekking.
Merino wool is your friend on the mountain. It is sweat-wicking, dries quickly & maintains its fresh scent! Cotton is your enemy for all the opposite reasons.”
A strong message I read was to never wear cotton clothing on the climb. Any performance wear you have will serve you well, but merino wool may be more expensive but it’s worth its weight in gold! I invested in socks too for all the right reasons!
In addition, I bought a Camelback water pouch (2 litres) & a thermal flask, especially for summit night. The straws on the Camelback have a habit of freezing when it reaches these extremes of temperature. A top tip is to blow the water back up the pipe after drinking, tie it & tuck it into your bag for extra protection.
What technology should I take?
Be aware that batteries can die very quickly once you hit a certain height & the cold kicks in. I decided against taking my big DSLR camera due to weight/bulk & don’t regret my decision.
I do regret leaving my iPhone on the table at home before I flew to Tanzania… but that’s a different story!”
My main source for capturing the magic was my GoPro which was perfect for both photos & video. I bought an extra 2 batteries & a charger which was a great investment. I also had 3 mini SD cards to rotate, making sure I had enough storage. You can see the results in my Video Diary.
Also important was a power bank which was invaluable. Our guide carried a genius solar panel on the back of his pack which I used once. It was great but don’t expect everyone to have one, it was more of a bonus pre-summit night!
A good headtorch is essential. Brigit also brought another torch which we hung in the tent at night. Bring spare new batteries & put them in for summit night. The climb will be at least 6 hours & your only source of light.
Apart from that, my advice would be to limit your technology & set expectations with family & friends that you will be unavailable until you finish.”
At a few of the camps, I managed to get a signal (a new phone purchased in Moshi with a Tanzanian SIM). A message home may be possible at Barranco, Karanaga & Mweka Camps but I wouldn’t trust or rely on it. Brigit struggled to get any word out until we reached Mweka Gate, basically right at the end.
What to pack?
So, without further ado, here is my ultimate Kilimanjaro Packing List!
 Footwear
- Waterproof walking boots. It goes without saying but make sure they are well worn in before you arrive. Blisters are not your friend!
- Lighter shoes for camp, either trainers or sandals. It is a relief to take your boots off when you finish hiking for the day, but camps have uneven ground so make sure they are sturdy enough for rocks/mud.
- Walking socks. I had 3 pairs of varying thickness. I wore my 2 thickest pairs on summit night & still had cold feet.
- Camp socks. Washing your feet in warm water after each day’s trek is a highlight. Not having to put hiking socks & boots back on is a benefit. I took a pair of warm bedsocks which were perfect! I slept in them as well.
Clothing
Layering is key. Expect to be wearing at least a thermal top & T-shirt with trousers for trekking but your guide should tell you each day what kind of temperatures to expect. On at least 4 days we had thermal leggings on for the trek too. Always bring a fleece & waterproof jacket in your day pack & expect the weather to change considerably during each day you are hiking. In addition, bring an outfit for the evenings in camp. You may not want to wear your trekking gear all day for 8 days. Bear in mind, it may be Africa but it is much colder than you may ever expect. Camps get cold & the sunsets are early. I took a pair of running leggings for this, but they were way too thin for all but the first night.
For summit night you will be wearing all your layers. I had a base layer, running leggings, t-shirt, long-sleeved shirt, fleece, fleece trousers, ski jacket & trousers plus a scarf, hat & 2 sets of both gloves & socks. My body was warm enough, but my hands & feet got cold.
Packing List
- Thermal base layer x2. These will be useful for the colder temperature hikes but also act as your sleepwear every night. Merino wool is key.
- T-shirt & long-sleeved top x2/3. Non-cotton, ideally performance fabric.
- Hiking trousers x2.
- Fleece jacket.
- Fleece trousers.
- Neck scarf. Sun protection &/or warmth on summit night.
- Warm hat for colder days, ideally which protects the ears.
- Sun hat.
- Inner thermal gloves & outer ski mittens. I also had a fingerless pair which I wore most days.
- Underwear. Non-cotton, ideally merino wool or microfibre.
- Sports Bra.
- Waterproof jacket (breathable). A poncho works well also. This saves the need for waterproof trousers & additionally protects your daypack.
- Waterproof trousers. Not needed if you go for the long poncho option.
- Ski jacket
Luggage & Essentials
- Duffel bag for all your stuff, including your sleeping bag. Some companies limit the weight to 10kg once packed.
- Daypack. Make sure it is at least 25-litre capacity, with a hip belt & chest strap. It will need to fit everything you require for a day’s trek including layers, water, snacks, a camera, wet wipes, toilet paper etc. Make sure it fits your body & again that you have used it for your training hikes.
- Sleeping bag for -10 to -150C temperatures.
- Sleeping bag liner.
- Earplugs. I didn’t use them but if you are a light sleeper they will be useful.
- Sleeping mat. I recommend Thermarest.
- Towel, ideally a camping towel for quick drying.
- LED head torch & spare batteries.
- Pen.
- Sunglasses.
- Camera &/or video camera with spare batteries & memory cards.
- Mobile phone.
- Powerbank & leads for all devices.
- Walking poles.
- Dry bags.
- Snacks & treats.
- Minimum 2-litre water pouch (e.g. Camelbak).
- Thermal bottle.
- Hand/Footwarmers.
 Important Documents
- Passport.
- Tickets.
- Travel Insurance documents.
- Tanzanian Visa or US$50 for Visa on arrival. For ease, you can get this ahead of time by following THIS LINK.
- Cash in US$ & make sure you have enough to cover all tips. Envelopes also come in handy to split this out for guides & porters.
First Aid Kit
- Prescription Medicine.
- Paracetamol & ibuprofen.
- Diarrhoea treatment.
- Electrolytes/Rehydration tablets.
- Plasters & blister treatment (Compeed).
- Antiseptic Cream.
- Muscle rub/Deep heat
- Antihistamine.
- Lip balm with SPF.
- Scissors/tweezers.
- Throat lozenges. Heavy breathing left my mouth dry & I found myself coughing, particularly at high altitudes & uphill sections. On summit night, in particular, I found these invaluable.
- Glasses/contact lenses.
 Toiletries
- Dry Shampoo.
- Toothbrush & toothpaste.
- Antiperspirant Deodorant.
- Wet wipes.
- Tissues.
- Toilet paper, 2 rolls.
- Sunscreen SPF 30+.
- Cleanse/Tone/Moisturiser.
- Feminine hygiene products.
- Hand sanitiser.
- Nail brush.
May Not Be Required:
Insect repellent for your time on the mountain. For my route, the start of the climb is too high for mosquitos although it will be required for Moshi.
Malaria tablets. I had started them but was advised to stop before the climb due to potential side effects.
Water purification tablets. All the water you drink is boiled for purification. You may want to bring something to improve the taste (electrolyte/rehydration salts will do the trick). I had no issue with the taste of the water & no problems drinking it.
What else?
I hope I have provided you with everything you need to know before attempting this epic climb. All I have left to say is that climbing Mount Kilimanjaro was one of the most rewarding things I have ever done.
The mountain will test you both mentally & physically, but you will come out with a new understanding of what you are capable of.”
Summitting is not everything. My advice is to not pin your idea of success on getting to the top. The journey is life-enhancing & enriching in itself. Good luck & enjoy!
Interested to read more?
You can also Subscribe Here to get regular updates & special offers from Sue Where? Why? What? along with a copy of my 201 Inspirational Travel Bucket List Ideas for FREE! I hope you choose to join me on the journey.
This post may contain affiliate links. By using these, Sue Where Why What may receive a small commission. You will not pay any extra charges for this. My opinions, reviews & recommendations remain my own. For more information see my disclosure.
My Gallery

 English











Sue, this is a really comprehensive guide to climbing Kilimanjaro! Very impressive. And I am still way impressed by your completion of this feat. So what’s next for you?
Thank you Wendy! Good question, not sure yet but looking forward to making a few decisions soon. Sue x
I am still so impressed you did this! I had no idea it would take a crew of 12 for 2 people. Thank you for all this really helpful information. So useful and appreciated!
Thank you, Heather, & really pleased that you found it useful. Sue x
This is such a comprehensive guide to Mt. Kilimanjaro. It’s my neighbouring country and on my bucket list. But first I have to summit Mt. Kenya! And I agree with you any mountain climbing activity has to take more than 5 days to do it successfully
Thank you, Sharon, & good luck with Mount Kenya, it sounds like the perfect “stepping stone” to Kilimanjaro! How amazing to live in Kenya, such a beautiful country.
A great comprehensive guide for to climb the Kilimanjaro! Very impressed you could do it. Enjoyed the blog post. Did you suffer any altitude sickness? What are you planning next? 🙂
Thank you Jan & glad you enjoyed it. I did suffer from the altitude but thankfully not on Summit Night. If you check out my other Kilimanjaro posts you can read all about it. Not quite sure what’s next but I always felt that Kili was my last big physical challenge…apart from staying fit generally. But never say never… Sue x
Tanzania is one of the countries I’m planning to visit as soon as I can leave covid-jail. The reason I enjoyed this post so much is that I probably won’t climb Mount Kilimanjaro – I don’t think I’m fit enough – therefore, I accompanied you virtually 😉
Thank you, Renata! I’m glad I managed to give you a glimpse into what it is like…so now you don’t have to! 😉 Sue x
Hello Sue,
I love this detailed list.
Do you have a break down of how you combine your clothes daily?
Thank you Anne. I don’t have anything specific. Most days I wore my trousers & a thermal, t-shirt, fleece & then maybe a waterproof jacket when we started. Once we were walking I started to take off layers & then put them back on when the rain set in later in the day. As we got higher I would also wear my thermal leggings for hiking. But on summit night you wear pretty much everything & are grateful for every single layer. I hope that helps?
I was once offered the opportunity to do one of these treks, having read this, I’m glad I had other commitments that meant I had to turn it down. I wouldn’t have been either mentally or physically fit enough. Not that I wouldn’t like to do it – I just prefer to walk at my speed, and enjoy the wildlife and nature en route.
This is information that anyone needs to know before doing such a trek. Thank you.
Thank you Annie & glad you found the info useful. It is a tough challenge to take on & I believe that you need to be fully prepared for it.